Animation looks attractive and appealing, thus being an apt choice for grabbing the attention of the viewers.
No wonder, most graphic designers use animation for their designs to give them a distinctive look. Thanks to the advent of technology, animation is not just confined to figures and drawings.
You can now even create typography animation which is simple words means using animation effect on text to spread your message.
Also known as kinetic typography, this has become quite popular which is why lots of people are trying their hands in it. In fact, if you check the visual design trends of 2016 , you will be amazed to know that animated typography is an integral part of graphic designing.
See Also: 30 Excellent Typography Tools and Resources for Designers
Wondering how you can create typography animation? Here is an insight into how you can design this using Photoshop.
1. Using the Variables
Usually the Variable function is not used much when creating designs in Photoshop. However, these sure come in handy when creating animation typography.
In fact, using variables can help you in saving a lot of time as it allows you to import the text from another document and then create separate layers in Photoshop.
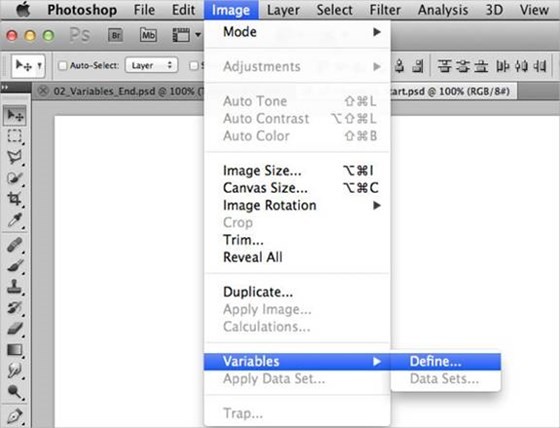
For this, click on the Image option on the menu bar and select the option Variable. From the sub menu, select Define.
2. The Text Replacement Process
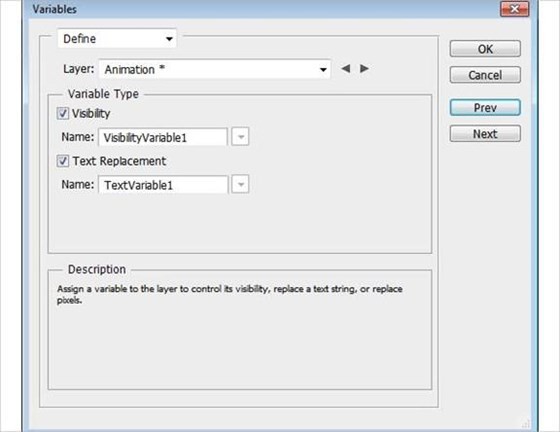
As soon as you click on define, you will be presented with a dialog box. In this box you will see a number of options like Layer, Text Replacement etc. When you click on the Layer option, you will get a drop down menu with various options like Text 01, Text 02 etc. Start with Layer -> Text 01.
Now, check on the Text Replacement check box and choose the Name as TextVariable1. This is the name that you have assigned for the first layer.
Continue doing this for all the 11 layers by changing the text replacement names to TextVariable2 to 11.
3. Importing the Text
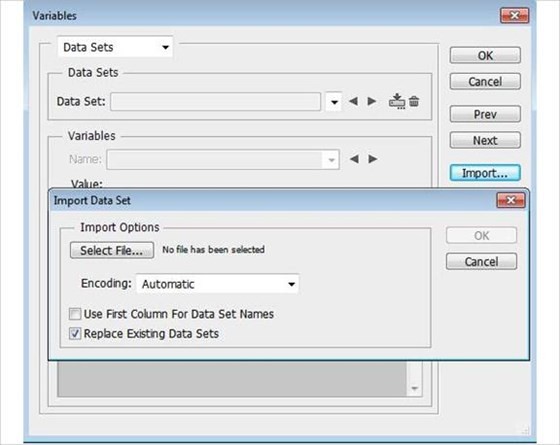
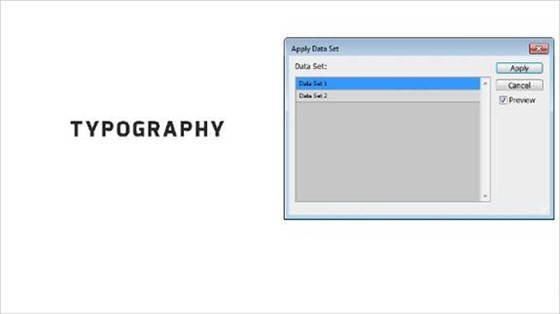
Once you have named all the layers, click on the Next button in the Define dialog box. This will open a second dialog box for you known as the Data Sets.
Here, click the Import button. You will get a small dialog box where you need to choose the Select File option. Now choose the file from which you wish to import the text.
4. Updating the Data Sets
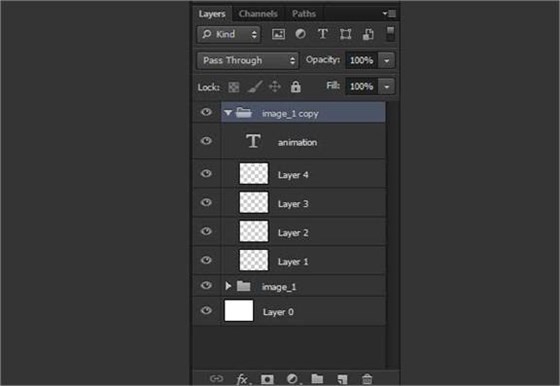
The selected text would be added to the Layer panel. Make necessary changes to this text and all the layers and data sets would be automatically updated.
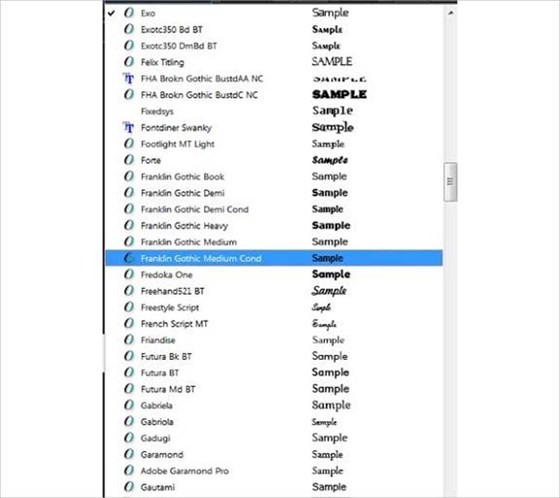
5. Preparing the Text for Animation Effects
Now is the time to decide on the style and the layout of the text. You can change the font by using the Type Tools Preset menu. You can also arrange the text into various layers by using the Layers panel which lies under the group Layers.
Doing this will save you a lot of time when adding effects to the text. Save this file. The file will have an extension .aep.
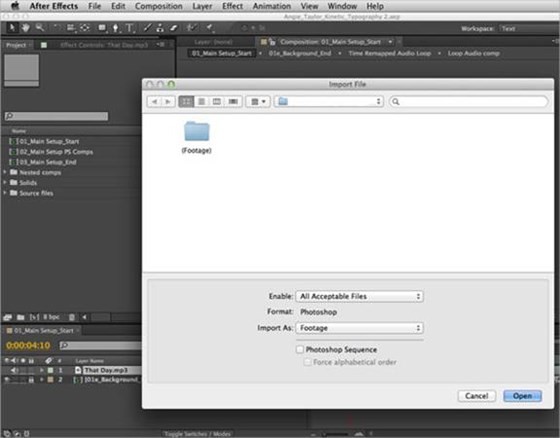
6. Getting to Know the File Layout
Open the file in Adobe After Effects. You will see that the Layer file would be present as a comp within the main file.
7. Adding Markers with Audio Bits
There is no way you can design animation typography without some audio. This not only enhances the look of the whole thing but also helps in designating markers for each effect.
Start by selecting an audio file and press L twice in quick succession. This will open the wave form of the audio file.
Now preview the text comp and as you listen to the audio, hit star where you want to add in the effects. This will create markers.
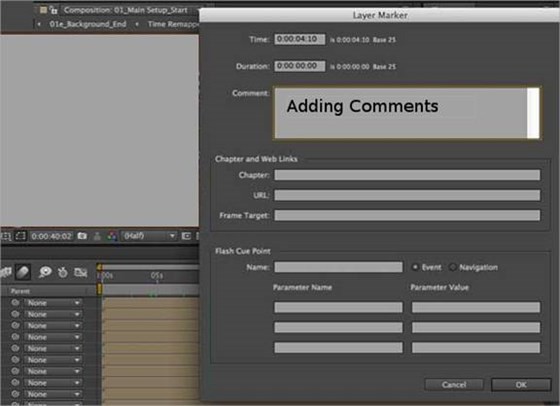
8. Adding Text to the Comments
Double click on a marker. This will open a dialog box named Layer Marker. In the Comment box, copy and paste the text that you want to appear with the given marker. Press OK.
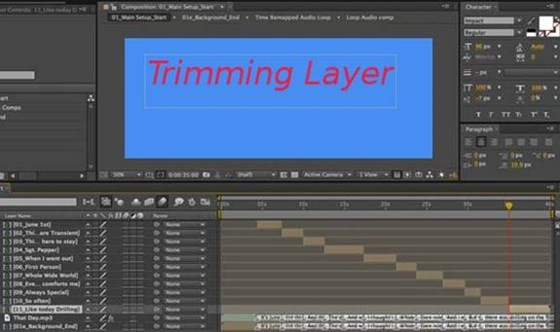
9. Trimming Down the Layers
Designating markers and connecting them with the layers is not enough. In order to ensure a fluency in the whole process, you need to trim all the layers such that they collate into each other.
Do this by pressing K. This will take you to the first marker. Select the layer corresponding to this and press Alt + [. This will trim the In point.
Now go to the next maker and select the layer. Here press Alt+] to trim the Out point. Continue this until all the layers have been trimmed.
10. Grouping the Words
Now you need to group the words that you want to be showcased at a particular marker. Start by selecting one layer by pressing K and then hit [.
This will help you to move In point of the layer to the relevant time marker. Continue this method for all the layers which you want to group together.
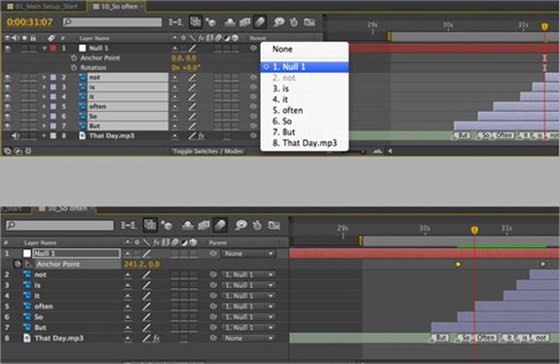
11. Creating Nulls
In order to have a single control for each group of animated text, you need to add these under a null parent. Do this by selecting Layer -> New. Now select Null Object and choose Null1 for the first group of words.
This will give you a single set of commands to control the whole group without affecting their animation settings. Continue doing this for all the word groups.
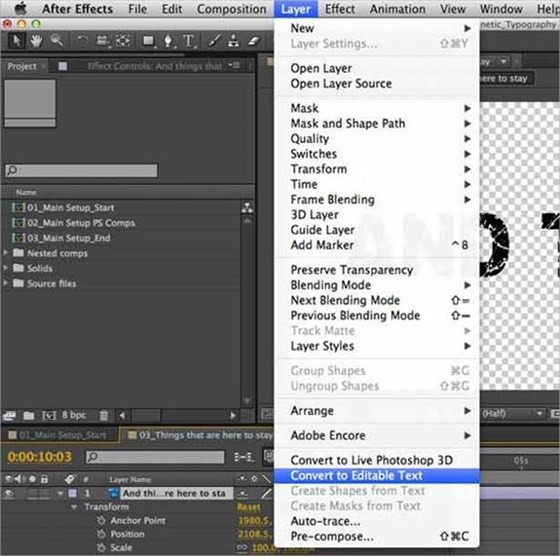
12. Converting the Text into an Editable Form
You can even convert certain text into an editable form. To do this, select the text and click on Layer. Now click on Convert to Editable Text. This will change the format of the text.
So, now that you know how to create animation typography using Photoshop, go ahead and try it out.